
An Easy Home Office DIY Pin Board by BrandWell
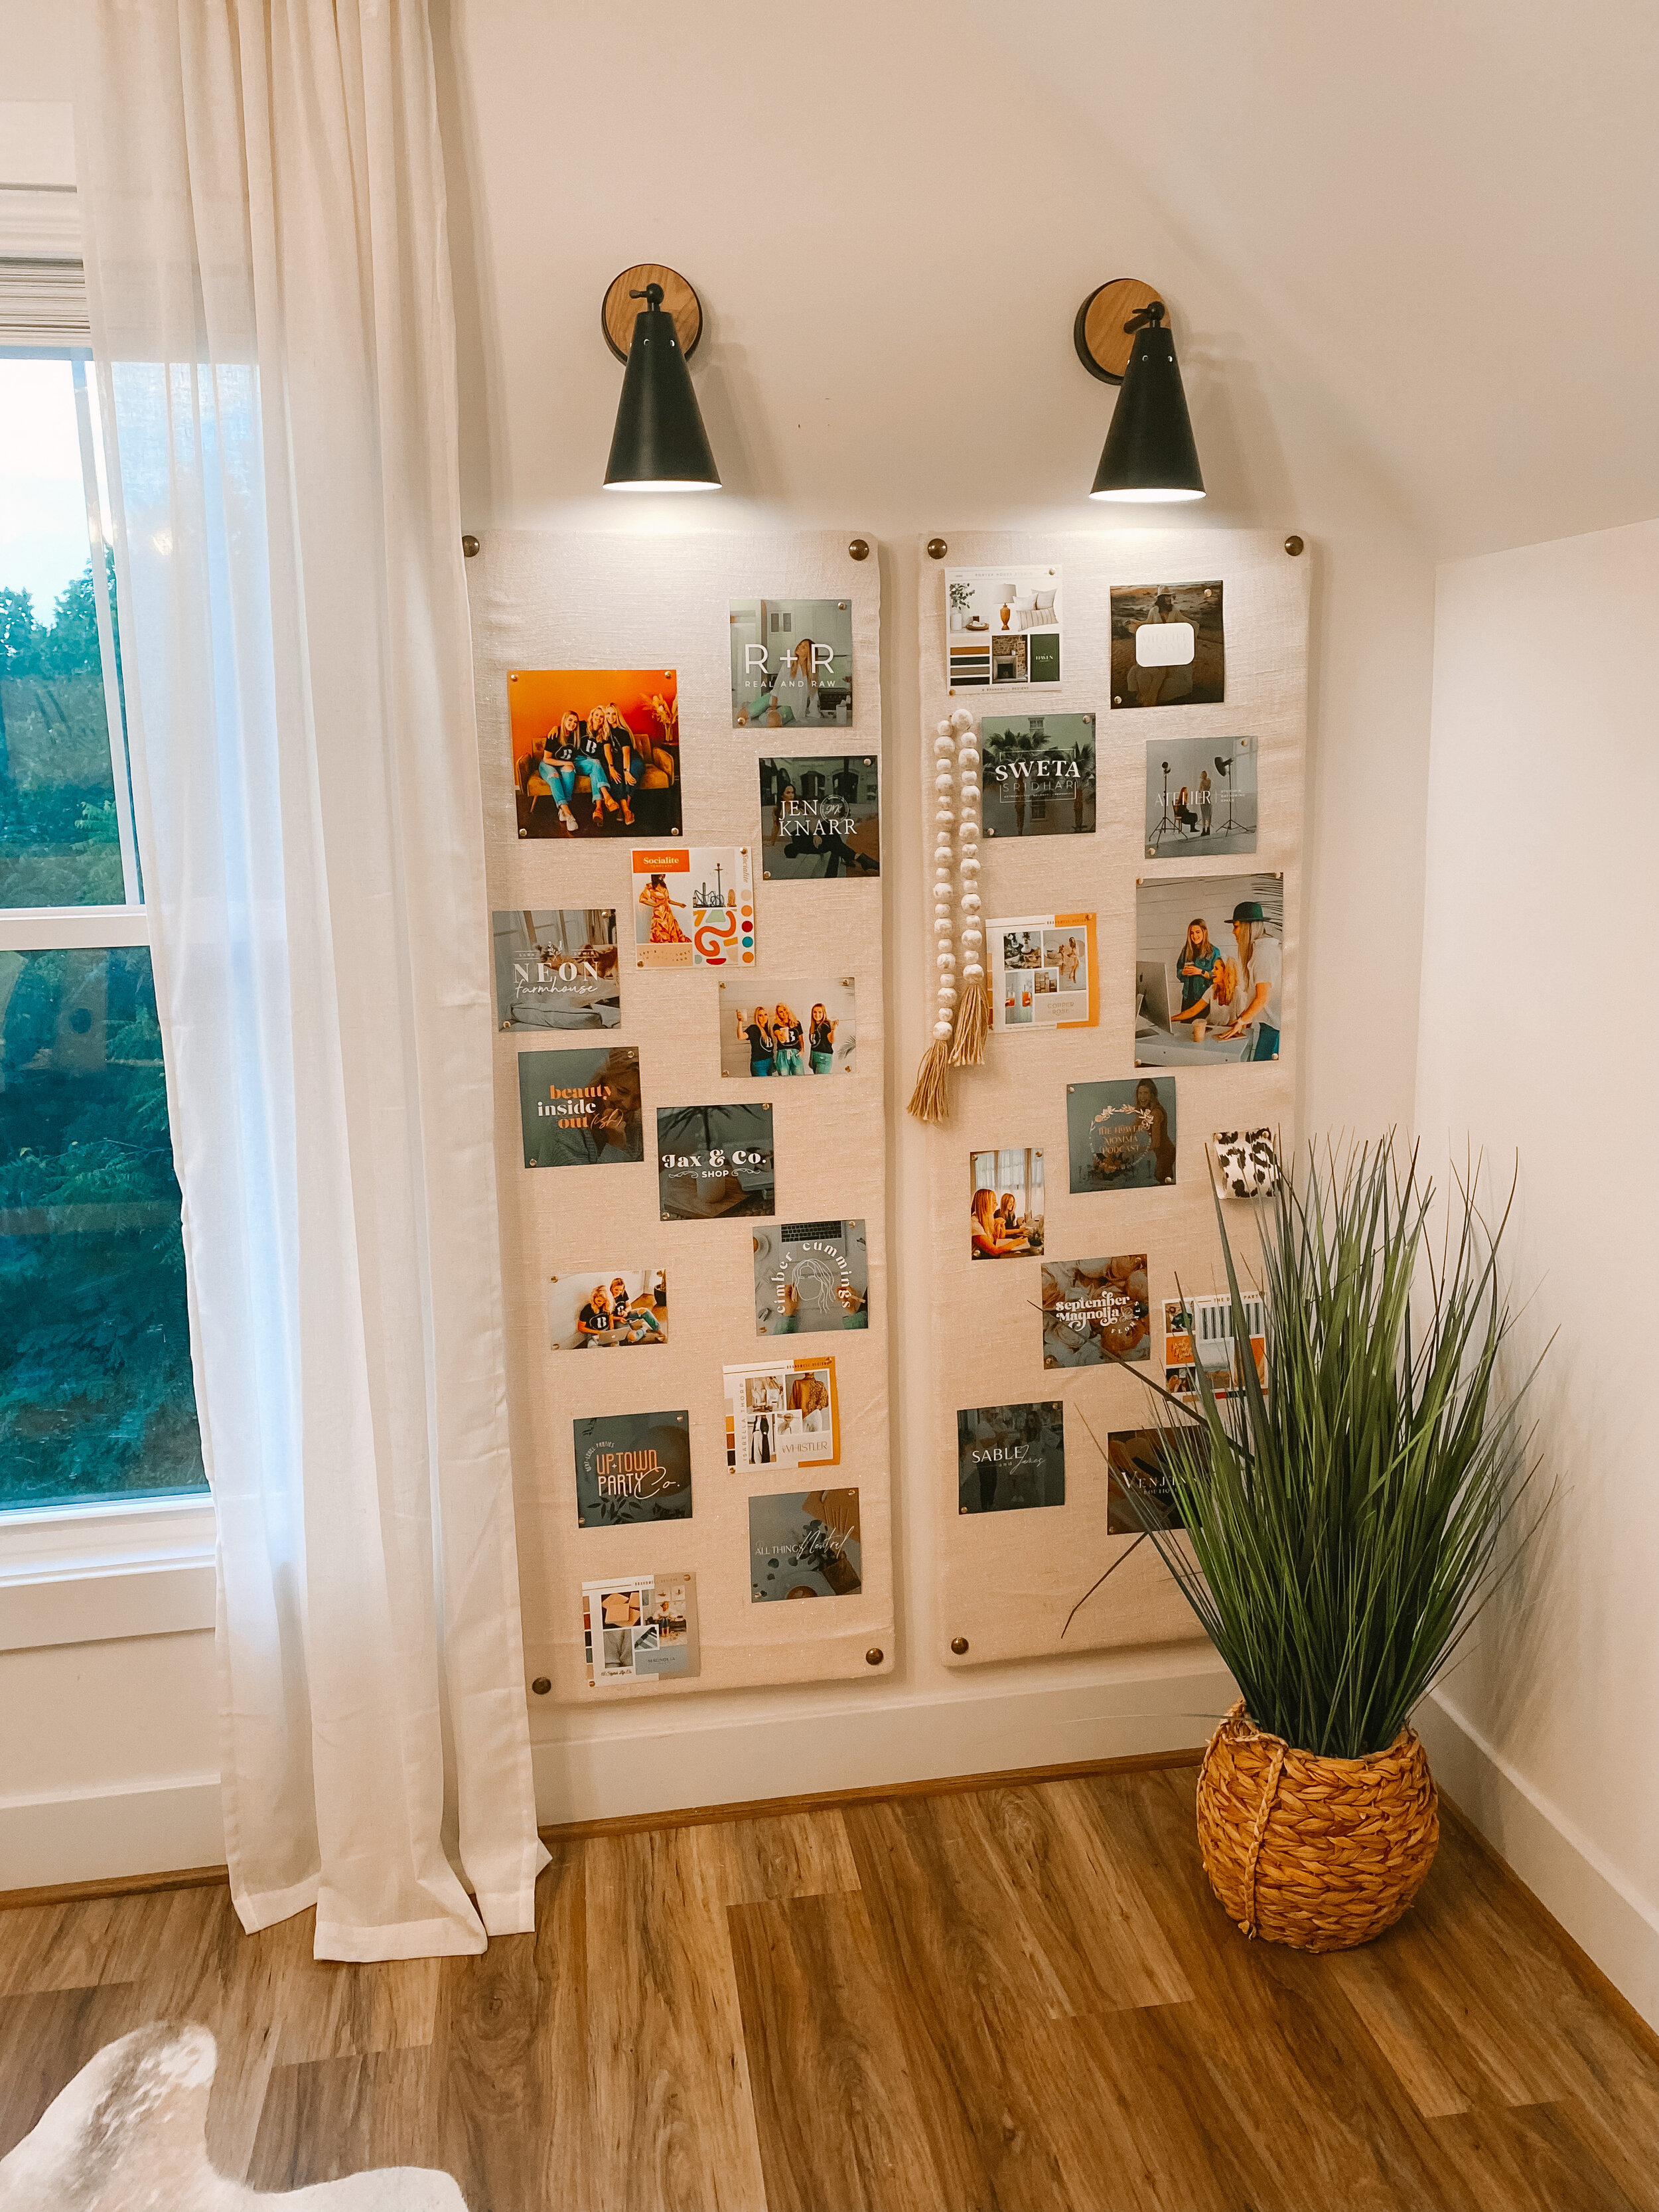
For years, I’ve tried to figure out a way to display all of the beautiful brands we have designed for our clients in my office. I love me a good online portfolio but I also wanted to have something tangible- something that I could look at each and every day when I’m working at my desk and be inspired by... So became the idea for this DIY Pin Board project!
What you’ll need:
Here is a list of everything that I used and where I bought it:
Foam board insulation from Lowes
Burlap from Hobby Lobby (I found a beige burlap with flicks of gold and I loved it just the way it was. You can also paint the burlap any color you’d like!)
Brass Furniture nails from Hobby Lobby (this is what takes it from DIY to store-bought. Don’t skip this part!)
Staple gun
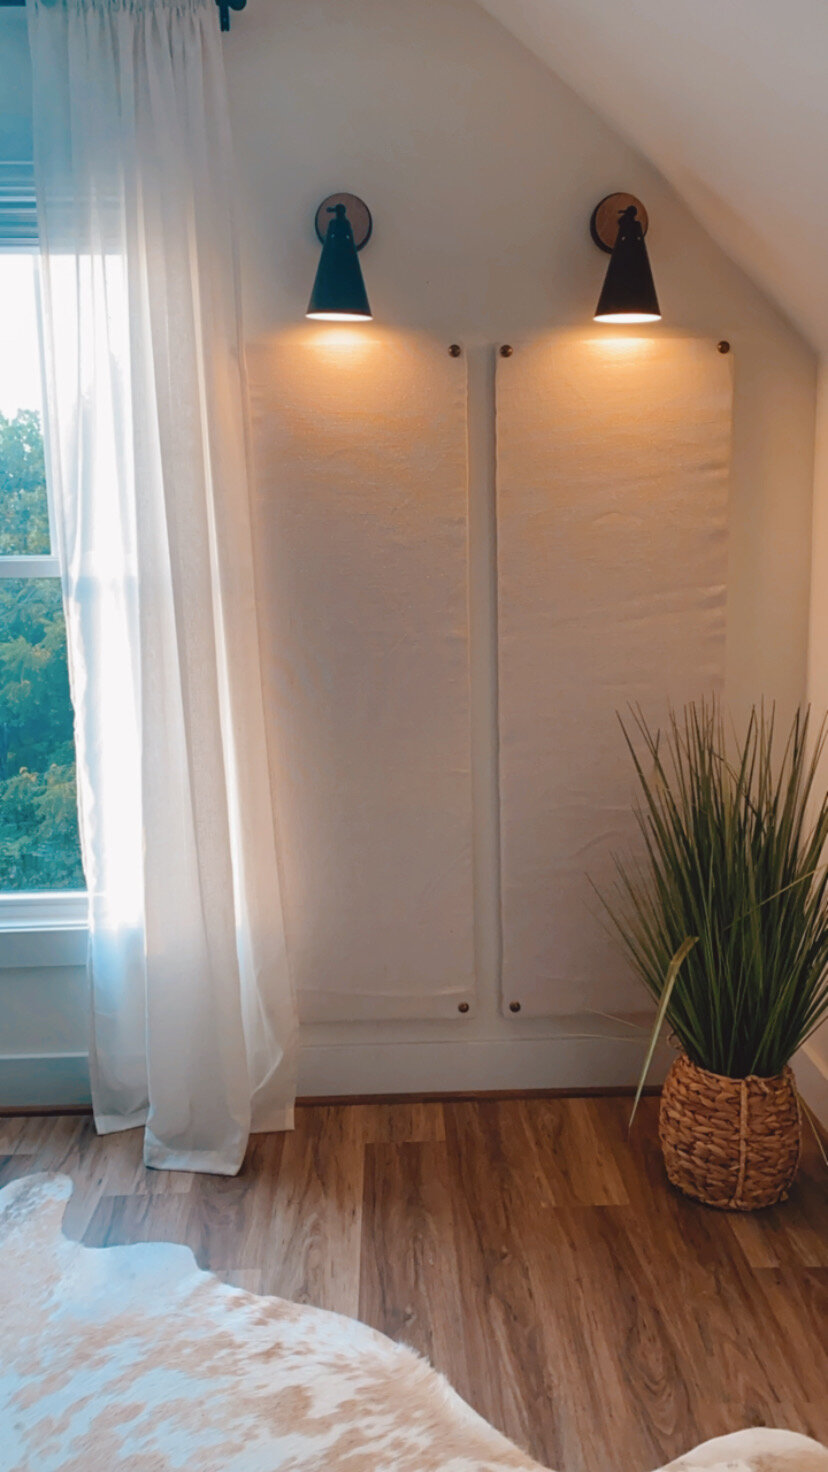
I added sconces above my pin boards to elevate the look a bit. My sconces were super affordable from Amazon!
Bonus!! We didn’t want to hassle with electrical but I also didn’t want a cord coming down behind my Pin Boards so I grabbed two battery operated light bulbs from Lowes.
The Process:
Measure. You’ll first want to measure the wall that you’re planning the DIY Pin Boards to go on. You could certainly do one large board rather than two smaller ones but I liked the added dimension it gave my wall by having two.
Once you’ve got your measurements, you’ll need to plan out how much foam board and burlap you’ll need to create your DIY Pin Board. I always like to play it safe and get more than what I really need. My boards are 20” wide and 60” tall so I purchased one standard board of foam insulation which comes at 48” wide and 96” tall. Bingo!
I then purchased 4 yards of burlap from Hobby Lobby which was already 48” wide giving me plenty of excess (if you have excess, you can always stash it away for your next DIY!).
Cut your boards to size. Fortunately, my hubby loves a good DIY and he was willing to jump in on this project with me. We used his circular saw to cut the foam board to the specs but you could use an Exacto knife or a foam board cutter if you don’t have access to a saw.
Staple away! Get ready for some hand cramps, friends. I probably punched about 300 staples into these bad boys but I really wanted the burlap nice and taught and didn’t want any of the staples popping out on me a few months down the road. Make sure to pull the corners tight and fold them over, similar to wrapping a present.
Add your furniture nails. Just pop those suckers into the corners. I eye-balled mine but if you’re the measuring type, you do you, babe.
Hang and decorate! Pin Boards are so much fun because you can literally style them however you want. I printed off a bunch of logos and mood boards we had designed but also threw up some beads and fabric swatches to add layers and texture to the board. This is a fun DIY for a home office, a college dorm room, or even your cubicle at work! Make it any size and any color you want and then do your thang!!

I hope you enjoyed this little home office DIY! If you try it yourself, tag me on Instagram @brandwelldesigns!
Until next time, keep branding well!
Victoria